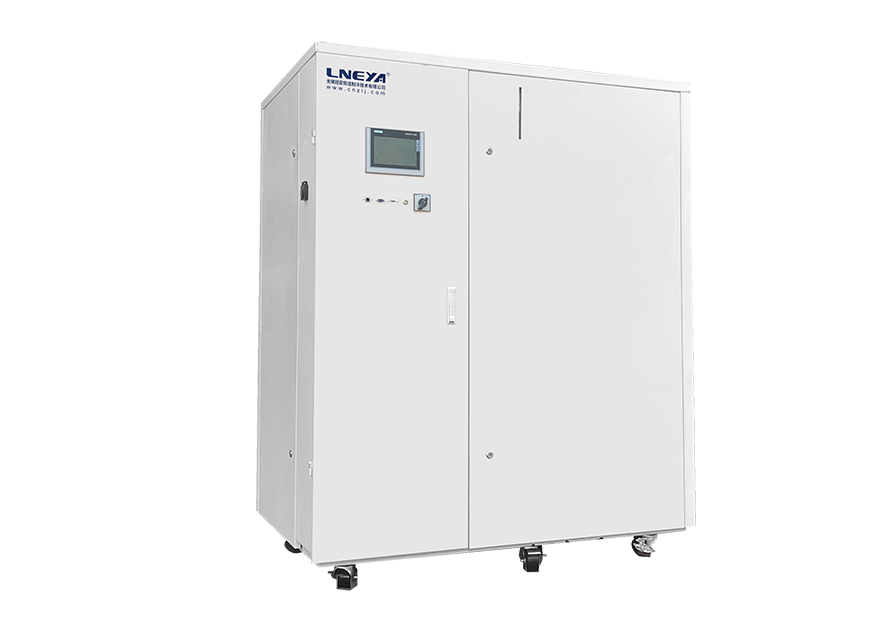
This article introduces common faults encountered when using industrial chillers, the causes of these faults, and how to troubleshoot and resolve them step by step. It helps you manage industrial temperature control more efficiently.
Safety Warning
Chillers have electrical components,and it will be dangerous if you try to repair the unit without proper certification. You should seek help from a trained professional.
Many chillers have built-in self-diagnosis systems. When a fault occurs, the chiller fault codes will be displayed directly on the operation screen.
You can refer to the maintenance manual provided by the chiller manufacturer to check the meaning of the code and determine the cause of the fault.
Common Causes and Solutions of Chiller Faults
Our technicians have found that most chiller failures are caused by incorrect sizing, improper operation, and lack of maintenance.
Incorrect Sizing The cooling capacity of the chiller must match your actual operating conditions. If the capacity is too large, the system will run under low load for a long time, which wastes energy. If the capacity is too small, the compressor will run continuously but still be unable to reach the set temperature. If you are not sure how to select the correct model, you can refer to this blog post.
Lack of Maintenance Effective maintenance ensures operating efficiency and extends the service life of the chiller unit. Dedicated maintenance personnel should regularly inspect all components of the chiller and keep records. Any minor issue should be identified and resolved in time.
Improper Operation As industrial equipment, chillers must be operated strictly in accordance with the operation manual and within the designed operating range. Otherwise, it may lead to equipment damage or even production accidents.
1.Chiller Cannot Start
If your chiller system cannot start, you can troubleshoot it according to the following steps:
1. Check the power supply Make sure the power supply is connected, the main switch is turned on, and the supplied voltage matches the rated voltage of the chiller.
2. Check the phase sequence Industrial chillers usually use a three-phase power supply and require a fixed phase sequence. If the phase connection is incorrect, the phase protection device will be activated and automatically cut off the power.
3. Check wiring and cables Inspect all wiring connections to ensure they are secure and not loose. Check for damaged or broken wires.
4. Check fuses or circuit breakers A blown fuse or a tripped circuit breaker will prevent the chiller from starting. Do not immediately replace the fuse or reset the breaker. The root cause must be identified and resolved first.
5. Check other safety protection devices Check whether temperature protection, pressure protection, flow protection, or other safety devices have been triggered. The unit can only start when all protection devices are in normal status.
2.Refrigerant Leakage
Signs of refrigerant leakage usually include low-pressure alarms, reduced cooling efficiency, unusual odor, uneven frosting on the evaporator surface, condensation, continuous bubbles in the sight glass, abnormal noise, and vibration. Common causes include pipe corrosion due to poor water quality, loose connections, and damaged heat exchangers.
If a leak occurs in your equipment, you can troubleshoot it according to the following steps. Note that some refrigerants are toxic, and these procedures must be carried out by qualified professionals.
1. Disconnect the power supply Turn off the chiller and disconnect the power supply. Wear protective gloves, safety goggles, and other necessary protective equipment.
2. Inspect pipes and joints Check all visible pipes, elbows, valves, and flange connections for signs of liquid leakage. If threaded connections are loose, tighten them with a wrench.
3. Inspect the heat exchangers Check the evaporator and other heat exchangers for scale buildup, corrosion, or cracks. Using unclean water or corrosive fluids can cause leakage points in the heat exchanger. Water quality should be tested regularly and heat exchangers should be cleaned as required.
4. Perform refrigerant leak detection Use an electronic leak detector or the soap bubble method to check the refrigeration system for small or hard-to-detect leaks.
5. Record and repair Record all leakage locations. After repairs are completed by professionals, test again to confirm there are no leaks and then recharge the system with the correct amount of refrigerant.
3.Slow Cooling
If the chiller runs for a long time but cannot reach the set temperature, you can troubleshoot using the following steps:
1. Check the installation environment For air-cooled chillers, make sure the fans operate normally and that nothing obstructs airflow around the unit. Air must circulate freely. For water-cooled chillers, check the temperature and flow rate of the cooling water and confirm that the cooling tower is functioning properly.
2. Check the refrigerant Insufficient refrigerant can cause inadequate evaporation in the evaporator, leading to poor heat transfer. Also, check the refrigerant flow; when the expansion valve operates normally, the correct amount of refrigerant should enter the evaporator.
3. Inspect heat exchangers Check the evaporator and condenser for scale or blockage that may impede the circulation of refrigerant and coolant.
4. Check the circulating fluid Ensure the type and concentration of the circulating fluid are correct. For glycol chillers, verify the glycol-to-water ratio meets the operational requirements of the unit.
5. Inspect electrical and control systems When setting the target temperature, ensure it is within the chiller’s operational range. Check that sensors and temperature controllers are functioning correctly.
6. Review operating parameters Use the control panel to monitor inlet and outlet temperatures, refrigerant pressures, and compressor operating status. Compare the chiller’s actual cooling capacity with the rated capacity to determine whether the selected unit matches your process requirements.
4.Excessive Noise
During normal operation, chillers generate some noise because the compressor runs and the circulating fluid and refrigerant flow through the pipes. Normal noise levels are typically around 55–75 dB. If the noise is abnormally high, it should be addressed promptly to prevent further issues.
1. Check the unit’s structure and installation environment Inspect screws and fasteners for looseness and ensure that brackets and the base are securely installed. If the unit is not level at the bottom, use vibration-damping pads or accessories to reduce vibration.
2. Inspect the fan For air-cooled systems, check whether the fan impeller is worn or deformed, as an unbalanced impeller can create vibration and noise. Insufficient bearing lubrication, abnormal operation, or blocked air ducts can also produce excessive noise.
3. Check piping All heat exchangers and piping must be properly arranged and fixed. Otherwise, they may collide during operation, producing knocking sounds. If pipes lack support, add brackets or vibration-damping pads.
4. Inspect the compressor Check whether the compressor base bolts are loose and whether internal bearings are worn.
5. Compare operational conditions Monitor noise levels under different operating states to determine if the noise is related to load conditions or other operating parameters.
5.High Discharge Pressure
Excessive discharge pressure in a chiller increases the compressor load, raises motor temperature, and can lead to motor burnout if the condition persists. When this issue occurs, it must be addressed promptly.
1. Check condenser heat dissipation For air-cooled chillers, low fan speed, blocked air inlets or outlets, or high ambient temperature can reduce the condenser’s heat dissipation, causing high discharge pressure. For water-cooled systems, high cooling water temperature or blocked condenser fins can lead to the same problem.
2. Check refrigerant Overcharging the refrigerant can cause it to accumulate in the piping and occupy condenser space, resulting in abnormal discharge pressure. Note that refrigerant recovery must be performed by trained personnel.
3. Check system vacuum If the system was not fully evacuated after maintenance, air may be trapped in the refrigeration system, typically showing as high discharge pressure inconsistent with the condenser temperature. In this case, the system must be fully evacuated and refilled with refrigerant.
4. Check chiller load Operating the chiller at full load for extended periods, or if the thermal load exceeds the chiller’s design capacity, can also raise discharge pressure.
The following table can help quickly identify the causes of high discharge pressure:
Symptom
Possible Cause
High discharge pressure + high ambient temperature
Insufficient heat dissipation
High discharge pressure + recently added refrigerant
Overcharging
High discharge pressure + after maintenance
Air trapped in the system
High discharge pressure + full-load operation
Chiller overload
6.Low Discharge Pressure
Low discharge pressure in a chiller can cause insufficient pre-valve pressure, reducing the amount of refrigerant entering the evaporator and leading to dry evaporation in the evaporator. It can also result in poor oil return, inadequate compressor lubrication, and accelerated compressor wear. Although this issue is not as urgent as high discharge pressure, it still needs to be addressed promptly.
1.Check for refrigerant leaks The most common cause of low discharge pressure is insufficient refrigerant. Use the previously mentioned signs of refrigerant leaks to determine if there is a leak. If a leak is detected, repair the leak, evacuate the system, and refill the correct amount of refrigerant.
2.Check condenser heat dissipation If the ambient temperature is too low, air-cooled condensers may be over-cooled by cold air, and water-cooled condensers may have excessively low cooling water temperatures. Overly efficient condenser heat dissipation can also cause low discharge pressure. This can typically be corrected by installing a condenser pressure control, reducing fan speed, or adjusting the cooling water flow.
3.Check the load A sudden reduction in heat load can decrease the evaporating volume, lowering system pressure. This is usually a process-related condition and does not necessarily indicate a fault in the chiller.
4.Check the expansion valve If the expansion valve is partially closed or blocked, the evaporator will receive insufficient refrigerant, reducing suction pressure. Reduced system circulation may also lower discharge pressure. At this point, check the filter, expansion valve sensing bulb, and system superheat.
5.Check compressor efficiency Severe internal wear in the compressor can prevent the compression ratio and discharge pressure from reaching normal levels. This can be assessed by measuring current and comparing the compression ratio with the nameplate specifications.
7.High Suction Pressure
High suction pressure in a chiller indicates abnormally high evaporator-side pressure, meaning the evaporating temperature is elevated and the compression ratio is reduced, which negatively affects the chiller’s cooling efficiency.
1.Check the equipment load If the heat generated by the cooled equipment or process suddenly increases, the inlet water temperature rises, causing the evaporating temperature to increase and suction pressure to rise. This is usually a process-related condition, not a system fault.
2.Check the expansion valve opening If the expansion valve is too open, the evaporator may receive excessive refrigerant, reducing superheat and increasing suction pressure. Typical system superheat is 5–8 °C, varying by model.
3.Check the refrigerant level Overcharging the system can raise the evaporator liquid level, causing suction pressure to be too high. This is often accompanied by both high discharge and suction pressures and excessive subcooling.
4.Check compressor discharge valve plates If the compressor’s discharge valve plates are damaged, high-pressure refrigerant may backflow to the low-pressure side.
The following table can help quickly identify possible causes:
Condition
Possible Cause
High suction + increased load
Process condition
High suction + low superheat
Overfeeding of refrigerant
Both high suction and high discharge
Overcharged refrigerant
High suction + low discharge
Damaged compressor valve plates
8.Low Suction Pressure
Low suction pressure in a chiller indicates insufficient liquid supply on the evaporator side or reduced refrigerant circulation in the system. The equipment may frequently start and stop, easily triggering the low-pressure protection.
1.Check for refrigerant leaks The inspection method has been described earlier; you can refer to the previous section.
2.Check the expansion valve If the expansion valve opening is too small or blocked, it can cause this issue. Measure the superheat to verify if it is too high.
3.Check the filter A clogged filter can cause abnormal pressure and temperature differences before and after throttling, reducing the liquid supply.
4.Check evaporator water flow Low water flow can cause unstable evaporation. Inspect the water pump, water filter, and piping to ensure they are functioning properly.
5.Check the heat load If the heat load is too low, suction pressure may drop. This is considered normal under operational conditions.
Final Thoughts
LNEYA provides a variety of temperature control equipment along with comprehensive after-sales services. We offer free technical training and 24/7 technical support to promptly resolve any issues you encounter while using chillers. Looking for the right equipment for a new project? Contact us!
 工業冷水機製造商 LNEYA Taiwan